The Power of Visibilities: A Comprehensive Guide
Welcome to the Getting Started Special Interest Group! In today's session, we will be diving deep into the world of visibilities. We will explore the purpose of classes and design layers, how they work together, and how saved views can help us control and navigate our files more efficiently. Additionally, we will touch on the use of materials in lieu of classes and the challenges of controlling colors in hatches. So let's get started!
Understanding Classes and Design Layers
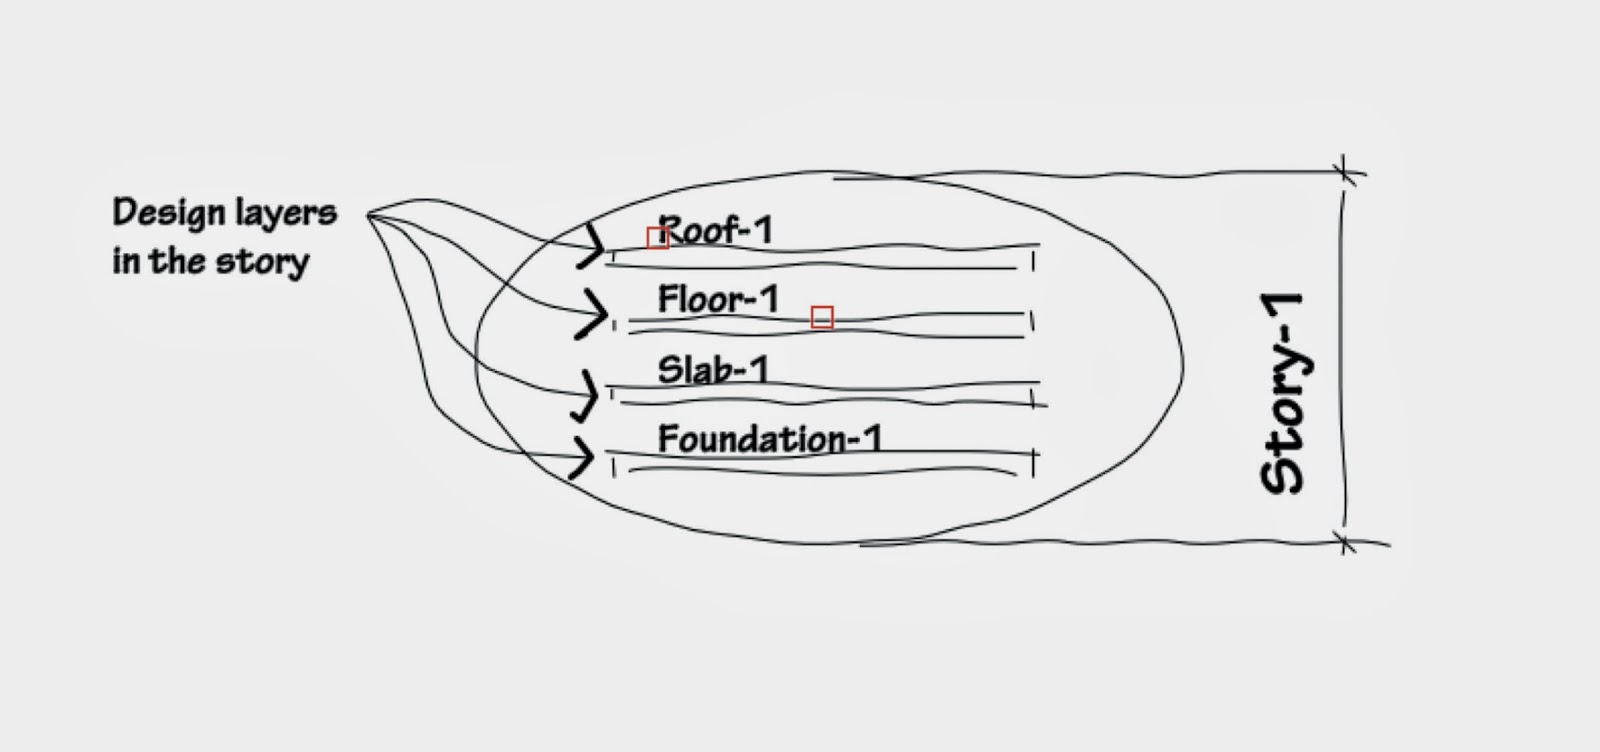
To begin, let's clarify the roles of classes and design layers. Design layers serve as horizontal chunks of information, grouping together all the elements related to a specific part of a building or project. For example, you can have design layers for the ground floor, first floor, basement, and roof. This structuring helps organize the file and makes it easier to navigate and manage different sections of the project.
On the other hand, classes are vertical organizers that determine the visibility and graphic style of objects within the design layers. They allow you to control the visibility of specific objects or groups of objects, making it easier to show or hide elements as needed. For example, you can have classes for electrical fixtures, plumbing fixtures, furniture, and more. By assigning objects to different classes, you can control their visibility independently of other objects.
Controlling Visibility with Classes
One of the primary uses of classes is to control the visibility of objects. By assigning objects to specific classes, you can easily turn them on or off as needed. This is particularly useful when you want to show or hide certain elements in different views or drawings. For example, you may want to show electrical fixtures in one view but hide them in another. By assigning the fixtures to a specific class, you can easily control their visibility without affecting other objects.
Jonathan demonstrates this by using the visibility tool, which allows him to quickly turn classes on or off. He shows how turning off certain classes in one design layer also affects their visibility in other design layers. This highlights the importance of using classes to control visibility, as it provides a consistent way to manage object visibility across different layers.
Structuring the File with Design Layers
Design layers play a crucial role in structuring the file and organizing information. By grouping related elements together on specific design layers, you can easily navigate and manage different parts of the project. For example, you can have separate design layers for the ground floor, first floor, basement, and roof. This helps keep the file organized and makes it easier to work on specific sections without cluttering the view with unnecessary information.
Jonathan emphasizes the importance of using design layers to structure the file and put information together. He explains that design layers serve as horizontal chunks of information, grouping all the elements related to a specific part of the building. This structuring makes it easier to manage and navigate the file, especially in larger projects with multiple floors or sections.
Using Saved Views for Easy Navigation
To address the challenge of having different views for different design layers, Jonathan introduces the concept of saved views. Saved views allow you to define specific settings for each view, including layer visibility and class visibility. This means you can easily switch between different views without manually adjusting the visibility settings each time.
Jonathan demonstrates how to create a saved view for a kitchen drawing. By turning off unnecessary classes and adjusting the rotation, he creates a specific view for the kitchen. This view can be easily accessed and applied whenever needed, making it convenient to switch between different views of the project.
He also explains the importance of redefining saved views when changes are made to the visibility settings. By redefining the saved view, you ensure that the changes are reflected in the view, providing an up-to-date representation of the project.
The Role of Classes in Graphic Style Control
In addition to visibility control, classes also play a significant role in controlling the graphic style of objects. By assigning objects to specific classes, you can easily control their line weights, colors, and other graphic attributes. This makes it easier to maintain consistency in the drawing and ensures that objects are presented in the desired style.
Jonathan demonstrates this by showing how classes are used to control the graphic style of different elements in the drawing. For example, he assigns a specific class to the walls to give them a gray shading, making them visually distinct from other elements. This use of classes for graphic style control simplifies the drawing process and eliminates the need to manually adjust line weights and colors for each object.
Using Materials in Lieu of Classes
While classes are commonly used to control the graphic style of objects, Jonathan mentions that materials can also be used for this purpose. By assigning materials to objects, you can control their texture, color, and other visual properties. This provides an alternative approach to graphic style control, especially when dealing with elements that require specific material representations.
Jonathan explains that the choice between using classes or materials for graphic style control depends on the specific requirements of the project. Both approaches have their advantages and can be used effectively depending on the situation. For example, if you need to control the color of window frames, you can assign a specific material to achieve the desired effect.
Controlling Colors in Hatches
Jonathan addresses the challenge of controlling colors in hatches, which are commonly used to represent different materials or textures. He demonstrates how to edit hatches and change their line colors. By accessing the hatch settings and adjusting the line colors for each level, you can customize the appearance of hatches to suit your needs.
He also mentions the importance of checking each level individually when editing hatches, as they are composed of multiple lines that repeat to create the desired pattern. By adjusting the line colors for each level, you can achieve the desired visual effect and ensure consistency in the drawing.
Conclusion and Future Outlook
In conclusion, the effective use of classes, design layers, and saved views is essential for efficient file management and drawing production. By understanding the roles of these tools and how they interact, you can streamline your workflow and improve the overall quality of your drawings.
The ability to control visibility, graphic style, and reporting through classes provides flexibility and control over the presentation of your designs. Saved views offer a convenient way to navigate between different views and maintain consistency in your drawings. Additionally, the use of materials in lieu of classes and the customization of hatch colors further enhance the visual representation of your designs.
As technology continues to evolve, it is important to stay updated with the latest features and functionalities of design software. Vectorworks, in particular, offers a wide range of tools and capabilities that can greatly enhance your workflow and productivity. By leveraging these tools effectively, you can create more accurate and visually appealing drawings while saving time and effort.
In the future, we can expect further advancements in design software, with new features and functionalities that will continue to improve the design process. It is important to stay informed and adapt to these changes to remain competitive in the industry.
In conclusion, the power of visibilities cannot be underestimated. By utilizing classes, design layers, and saved views effectively, you can take control of your drawings and create stunning designs that accurately represent your vision. So embrace the power of visibilities and unlock the full potential of your design software.
This article was written by deciphrAI, if you want to speed up your article creation, Join DeciphrAI